Top New AI features in Photoshop for Real Estate Photographers


Adobe Photoshop remains the gold standard in image editing, especially for real estate photography. Its latest release adds powerful AI tools, productivity upgrades, and tighter workflow control. These features expand creative possibilities while streamlining repetitive tasks – a major benefit for real estate photographers on tight schedules. Focused on efficiency, realism, and automation, the update helps professionals deliver polished results faster. With 90% of listings using edited photos and 83% of buyers ranking visuals as the top factor, keeping up with Photoshop’s AI-powered features is essential.
Here’s a closer look at the most valuable new AI-powered features real estate photographers and editors can use to produce cleaner, faster, and more professional results.
1. Enhanced Generative Fill with Firefly Image 3 Model
The Generative Fill tool, now powered by Adobe’s Firefly Image 3 Model, delivers more precise and realistic edits. Real estate photographers can add, remove, or adjust elements seamlessly while keeping images natural and true to the property.


Key Enhancements:
- Improved Contextual Understanding: The AI now better interprets the surrounding environment, ensuring that generated content blends naturally with existing elements.
- Higher Resolution Outputs: Enhancements result in outputs that are more detailed and suitable for high-resolution displays and prints.
Applications:
- Object Removal: Easily eliminate unwanted items such as furniture, personal belongings, or debris from property photos to present a clean and appealing space.
- Object Addition: Virtually stage rooms by adding furniture or décor, helping potential buyers visualize the space’s potential.
How to Use:
- Select the Area: Use the Lasso or Marquee tool to outline the object or area you wish to modify.
- Activate Generative Fill: Navigate to Edit > Generative Fill.
- Input Prompt: In the dialog box, enter a descriptive prompt, such as “remove the chair” or “add a modern sofa.”
- Generate and Refine: Click Generate and allow the AI to process. Review the result and use the Variations panel to select alternative outputs if needed.
Tips:
- Use Specific Prompts: The more detailed your prompt, the better the AI can fulfill your request. For example, “add a glass coffee table with metal legs” yields more precise results than “add a table.”
- Refine Selections: Ensure your selection closely hugs the object to avoid unintended alterations to surrounding areas.
- Combine with Other Tools: Utilize adjustment layers and blending modes to fine-tune the generated content for seamless integration.
Example:
Imagine photographing a property where the living room contains outdated furniture. In this situation, by using Generative Fill, you can remove the old pieces and replace them with modern furnishings, providing potential buyers with a fresh perspective on the space.
2. AI-Powered Remove Tool with Distraction Removal
The Remove Tool has been enhanced with AI-driven Distraction Removal capabilities, allowing for the automatic identification and elimination of common visual distractions in property images. This feature streamlines the editing process, ensuring photos are polished and professional.

Key Enhancements:
- Automatic Detection: The AI scans the image to identify elements like power lines, stray objects, or reflections that may detract from the photo’s appeal.
- One-Click Removal: With a single click, remove identified distractions without the need for manual selection or masking.
How to Use:
- Select the Remove Tool: Choose the Remove Tool from the toolbar or press Shift+J to cycle through the healing tools.
- Hover Over Distractions: Move your cursor over the image; the AI will highlight potential distractions.
- Click to Remove: Click on the highlighted area to remove the distraction. Afterward, the AI will intelligently fill in the area based on the surrounding content.
Tips:
- Review AI Suggestions: While the AI is powerful, always review the suggested removals to ensure they align with your vision.
- Use in Conjunction with Generative Fill: For complex backgrounds, after removing an object, use Generative Fill to add realistic elements that blend seamlessly.
Example:
In exterior shots of a property, power lines can be an eyesore. The AI-powered Remove Tool can quickly eliminate these, resulting in a cleaner and more attractive image.
3. Generative Expand for Image Extension
Generative Expand allows for the extension of image boundaries while intelligently filling in the new areas with content that matches the existing scene. This is particularly useful for adjusting aspect ratios or creating additional space around a subject.

Key Enhancements:
- Seamless Expansion: Extend the canvas in any direction, and the AI generates content that blends naturally with the original image.
- Aspect Ratio Adjustment: Easily adapt images to fit various formats required for different platforms or print materials.
How to Use:
- Select the Crop Tool: Press C to activate the Crop Tool.
- Expand the Canvas: Drag the crop handles outward to the desired size.
- Apply Generative Expand: After setting the new canvas size, click Generate in the Generative Expand dialog box.
- Review and Adjust: Once the AI generates the new content, review for consistency and make any necessary adjustments.
Tips:
- Maintain Original Proportions: When possible, expand uniformly to preserve the image’s original proportions and composition.
- Use High-Resolution Images: Higher resolution originals yield better results, since the AI has more data to work with.
Example:
A property photo may have been taken with tight framing, cutting off parts of the garden. In this case, using Generative Expand, you can extend the image to reveal more of the outdoor space, enhancing the property’s appeal.
4. AI Adaptive HDR Merge for Natural Light Balance
Shooting interiors often involves bracketed exposures to balance bright windows and dark corners. Photoshop 2025’s AI Adaptive HDR Merge introduces zone-aware blending that mimics how the human eye interprets light and color.
Key Enhancements:
- Zone Mapping: AI now identifies specific exposure zones – like windows, shadows, and reflections – and processes them independently.
- Realistic Dynamic Range: Maintains both detail in sunlit exteriors and clarity in shaded interior corners.
How to Use:
- Import bracketed exposures into Photoshop (or via Lightroom first).
- Navigate to File > Merge to HDR Pro (2025 AI version).
- Enable “AI Adaptive Light Balancer.”
- Adjust individual zone strength sliders (window, midtones, shadows).
Application:
Perfect for shots taken in challenging lighting, like bright kitchens with recessed corners or living rooms with skylights.
Tip:
Combine with Lightroom’s lens correction profile first, then use Photoshop’s new HDR engine for cleaner results.
5. AI-Powered Lens Correction with Smart Perspective Warp
Real estate photographers often rely on wide-angle lenses, but distortion is a challenge. Photoshop 2025’s AI Smart Perspective Warp fixes skewed lines with auto plane detection, depth mapping, and precise corrections.

How to Use:
- Go to Edit > Perspective Warp.
- Enable Auto-Detect Planes. Photoshop will scan your image for structural planes.
- Adjust Grids Using Smart Guides. Pull corner handles to align verticals or horizontals while maintaining the room’s depth.
- Toggle “Maintain Realism” Setting. This limits the AI from overcorrecting and preserves a natural look.
Tips:
Enable the new “Plane Lock” feature to freeze certain surfaces while you edit others. For example, lock the floor grid while adjusting wall angles to avoid ripple effects.
6. Sky Replacement 2.0 with Environmental Light Sync
Photoshop 2025’s Sky Replacement 2.0 is smarter and more photorealistic than ever, thanks to its Weather & Light Match Engine. This feature not only swaps out dull skies but also adjusts your entire scene’s color temperature, shadows, and highlights to match the new sky’s time and lighting.
How to Use:
- Go to Edit > Sky Replacement.
- Select a new sky from Adobe’s expanded high-res library (including blue hour, stormy skies, dusk).
- Enable “Environmental Sync”.
- Watch the scene automatically adjust – window glow, outdoor highlights, and shadow angles will shift to match the new lighting.
Application:
Turn a bland midday shot into a golden hour stunner – ideal for premium property listings or seasonal refreshes.
Example:
Upload a gray-sky exterior of a property. Then, replace with twilight sky. Notice the automatic warm tint added to windows and light reflections on nearby pavement.
7. Smart Object Auto-Masking with Edge Preservation
Masking used to be tedious – especially when isolating complex items like chairs, lamps, or trees with fine edges. Photoshop 2025 introduces Auto-Mask 2.0, powered by AI that understands object edges, shadows, and even transparent areas like glass or water.
Application:
- Works on Smart Objects, keeping edits non-destructive.
- Identifies objects like furniture, window panes, light fixtures, plants automatically.
- Maintains edge quality with better feathering and contrast detection.
How to Use:
- Convert your layer to a Smart Object.
- Right-click > Select “AI Auto Mask.”
- Choose the subject type (e.g. furniture, architectural lines, foliage).
- Use the updated Mask Properties Panel to fine-tune edges.
Tips:
For real estate, specifically, this is perfect for adjusting only the couch fabric color, blurring the background view from a window, or applying targeted lighting changes to artwork on walls.
8. Collaborative Cloud Editing with Real-Time Feedback
For photographers working with editors across time zones – or outsourcing post-production – Photoshop’s new Live Collaboration Mode (via Adobe Creative Cloud) transforms how teams work together.

Key Enhancements:
- Multiple users can open the same .PSD file in real time.
- Track changes with version history.
- Leave pinned visual comments (e.g. “brighten this wall” and “remove reflections from mirror”).
How to Use:
- Save your PSD to Creative Cloud.
- Click “Share for Editing”
- Invite your editing team (with view or edit permissions).
- Review feedback directly in-app, in context.
Application:
Photographers can upload shoots immediately. Meanwhile, editors on the other side of the globe begin retouching within minutes. This workflow shaves hours off turnaround time.
Tips:
Use with Slack, Notion, or Frame.io to manage review cycles for large property portfolios.
Curious how these AI-powered Photoshop features can supercharge your real estate photo editing? Let us show you. Partner with Imagtor to transform your workflow, improve consistency, and deliver polished results faster. Try our service risk-free with a FREE TRIAL, and take advantage of our 10% BULK DISCOUNT for larger orders. Your editing just got easier.
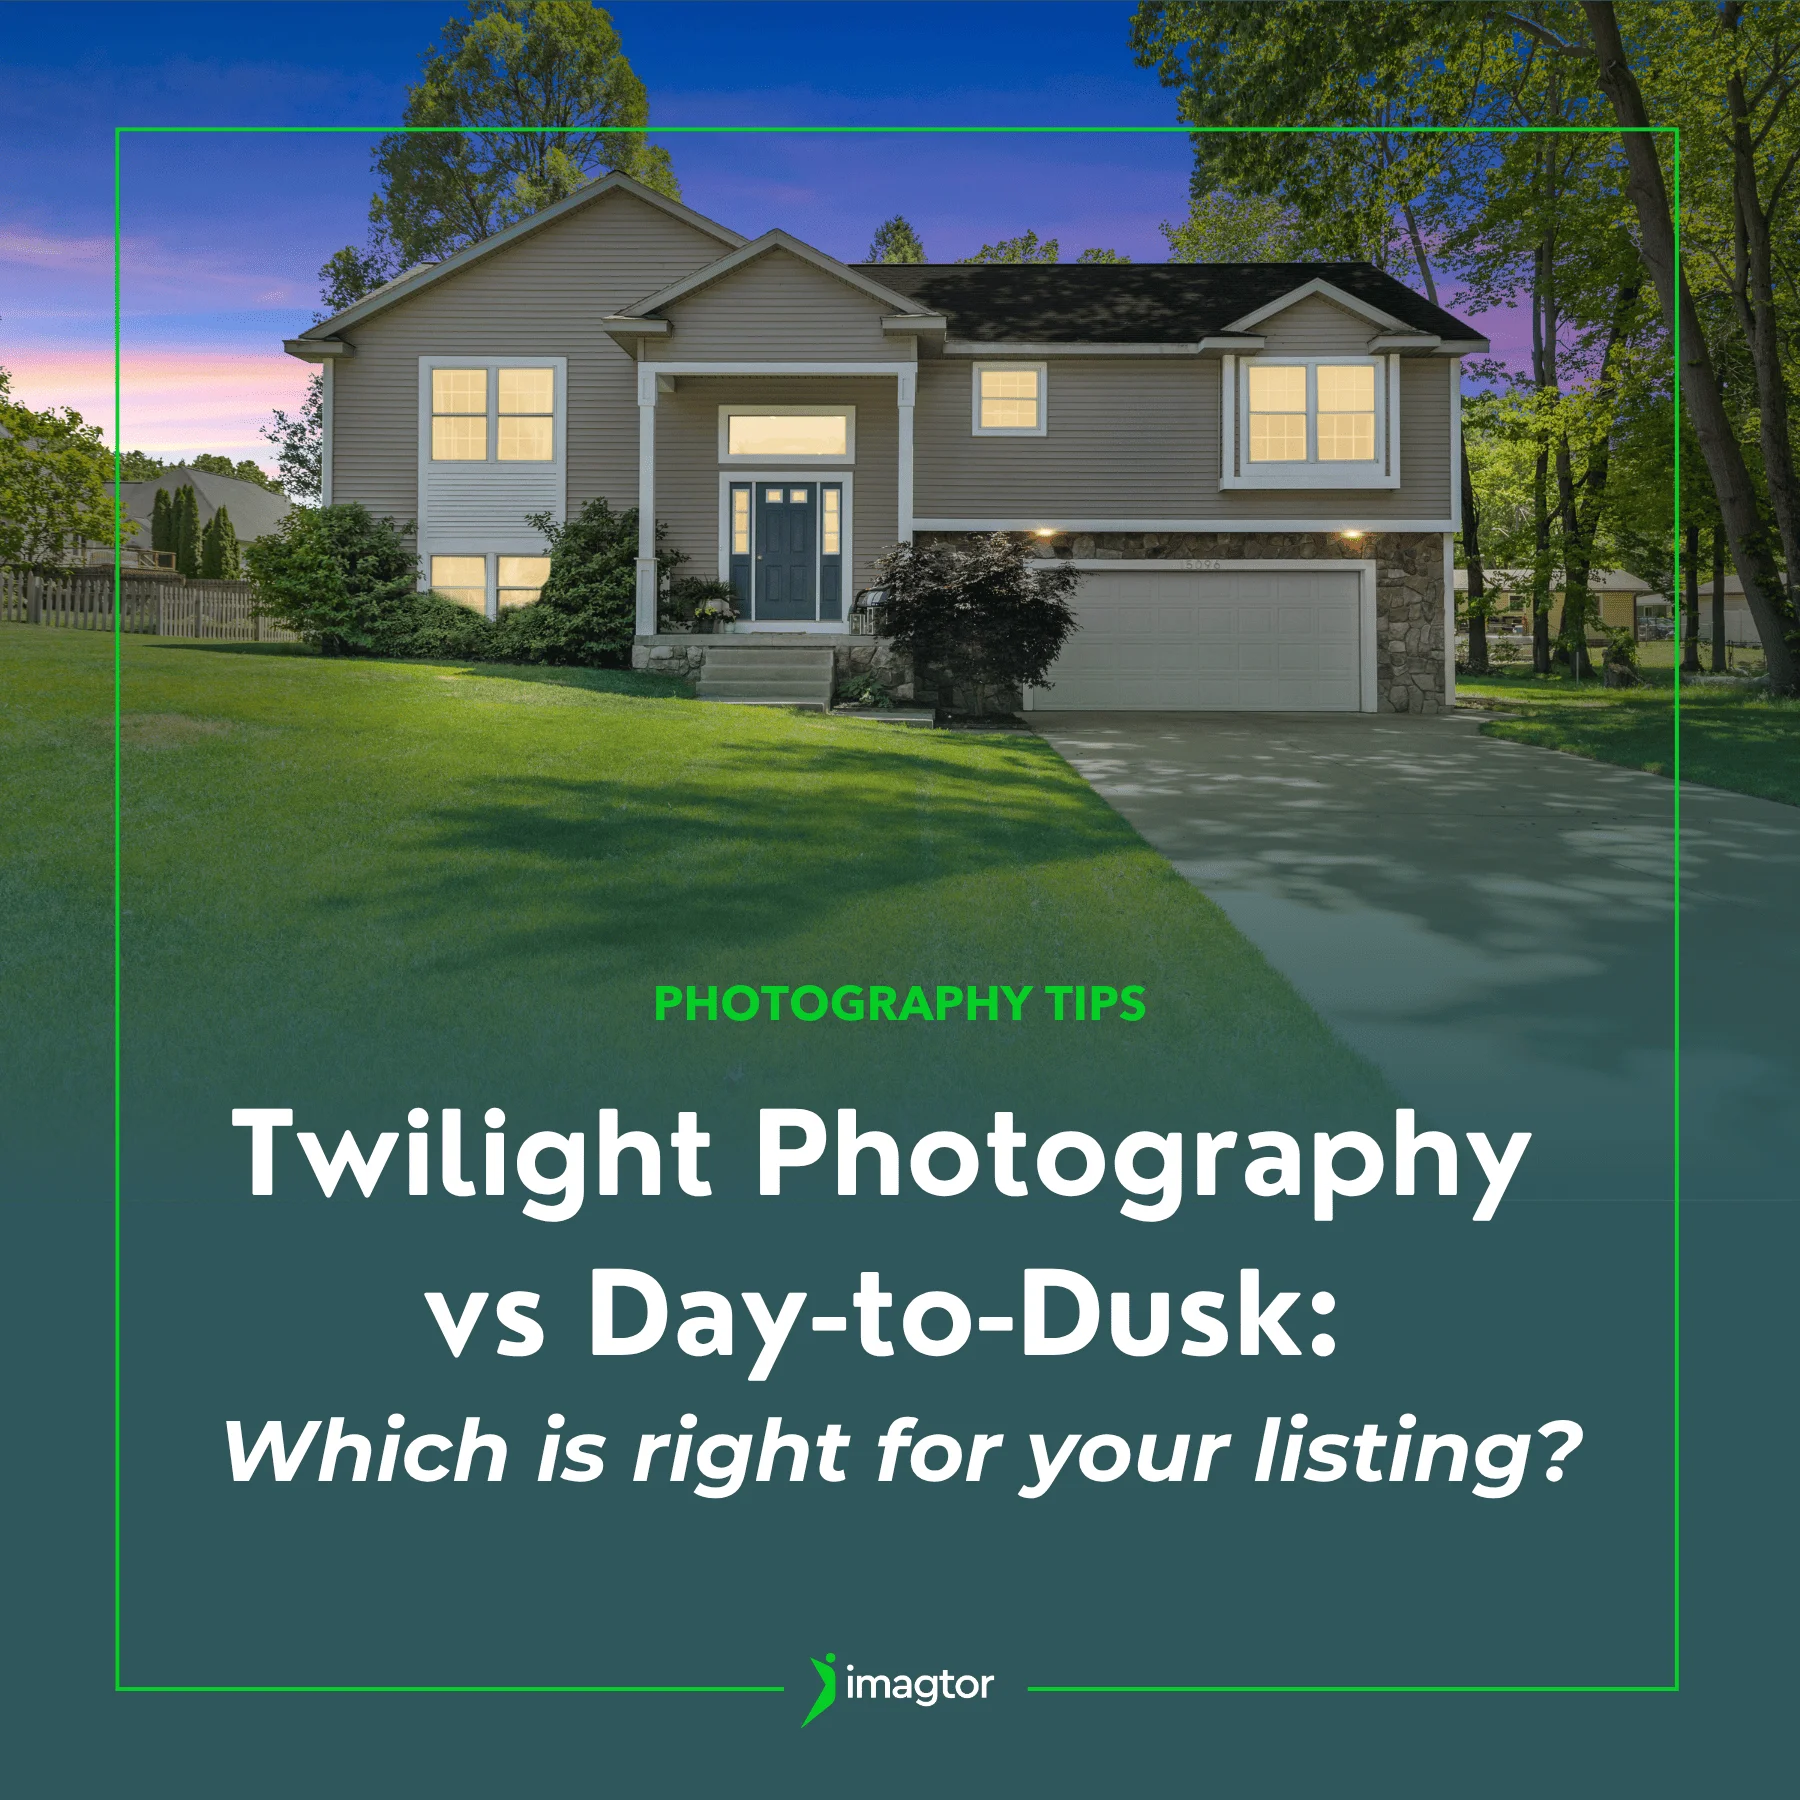
Twilight photography and day-to-dusk editing are two of the most popular ways to create striking exterior shots for property listings. Both approaches can produce beautiful results, but they work very differently and suit different situations. Knowing which one fits the property, the timeline, and your client’s goals can save you time and help you deliver …

Virtual staging has become one of the most practical tools in property marketing, helping vacant spaces feel warmer and easier for buyers to connect with. But empty room photos still have their place. Knowing when to use each approach can make a real difference to how a listing performs. Why empty rooms can be challenging …